<< Android-Note
タブを持ったアクティビティの作り方
複数のタブを持つアクティビティを作る方法を紹介します。
手順は次の通りです。
タブアクティビティのレイアウト
初めにアクティビティのレイアウトに次のようにTabHostとTabWidgetを追加します。
<android.support.v4.app.FragmentTabHost
    xmlns:android="http://schemas.android.com/apk/res/android"
    android:id="@+id/tab_host"
    android:layout_width="match_parent"
    android:layout_height="match_parent" >
    <LinearLayout
        android:orientation="vertical"
          android:layout_width="match_parent"
          android:layout_height="match_parent" >
        <TabWidget
           android:id="@android:id/tabs"
            android:orientation="horizontal"
            android:layout_width="match_parent"
            android:layout_height="wrap_content"
            android:layout_weight="0" />
        <FrameLayout
           android:id="@android:id/tabcontent"
            android:layout_width="0dp"
            android:layout_height="0dp"
            android:layout_weight="0" />
          <FrameLayout
         android:id="@+id/real_content"
         android:layout_width="match_parent"
         android:layout_height="0dp"
         android:layout_weight="1" />
    </LinearLayout>
</android.support.v4.app.FragmentTabHost>
TabWidgetの後に2つのFrameLayoutがあります。
1つめは表示されない見かけ上のビューなので"tabcontent"というIDをつけます。
そして、2つめがタブの本体なのでここではidに"real_content"という名前をつけました。
フラグメントの作成
タブに表示したいフラグメントを作ります。
例えば、レイアウトとして次のファイルを作ります。
<?xml version="1.0" encoding="utf-8" ? >
<LinearLayout xmlns:android="http://schemas.android.com/apk/res/android"
    android:layout_width="match_parent"
    android:layout_height="match_parent"
    android:gravity="center"
    android:orientation="vertical" >

    <TextView
        android:id="@+id/textView1"
        android:layout_width="wrap_content"
        android:layout_height="wrap_content"
        android:layout_gravity="center"
        android:text="Fragment1"
        android:textSize="24sp" />

</LinearLayout>
中央にテキストビューを1つ設置しました。
レイアウトからフラグメントを作るにはFragmentクラスを使って次のようなコードを書きます。
package com.MyApp.myapp;

import android.os.Bundle;
import android.support.v4.app.Fragment;
import android.view.LayoutInflater;
import android.view.View;
import android.view.ViewGroup;

public class Tab1Fragment extends Fragment
{
    public View onCreateView(LayoutInflater inflater, ViewGroup container,
                                            Bundle savedInstanceState)
    {
        View view = inflater.inflate(R.layout.tab1_fragment, container, false);
        return view;
    }
}
必要な数だけこのようにしてフラグメントを作ることができます。
アクティビティからタブを設置する
最後に次のようなコードでタブにフラグメントを設置します。
package com.MyApp.myapp;

import android.os.Bundle;
import android.app.Activity;
import android.view.Menu;
import android.widget.Button;
import android.widget.TabHost.TabSpec;
import android.support.v4.app.Fragment;
import android.support.v4.app.FragmentActivity;
import android.support.v4.app.FragmentTabHost;

public class MainActivity extends FragmentActivity
{

    protected void onCreate(Bundle savedInstanceState)
    {
        super.onCreate(savedInstanceState);
        setContentView(R.layout.activity_main);

        FragmentTabHost tabHost = (FragmentTabHost) findViewById(R.id.tab_host);
        tabHost.setup(this, getSupportFragmentManager(), R.id.real_content);

        TabSpec tab1Spec = tabHost.newTabSpec("TAB1");
        Button tab1Button = new Button(this);
            //タブに表示するビュー
        tab1Button.setText("Tab1");
        tab1Spec.setIndicator(tab1_button);
        tabHost.addTab(tab1Spec, Tab1Fragment.class, null);
            //タブとフラグメントを関連付ける。

        TabSpec tab2Spec = tabHost.newTabSpec("TAB2");
        Button tab2Button = new Button(this);
        tab2Button.setText("Tab2");
        tab2Spec.setIndicator(tab2Button);
        tabHost.addTab(tab2Spec);
    }
}
このコード中でレイアウトからタブホストを作っているのが次の2行です。
        FragmentTabHost tabHost = (FragmentTabHost) findViewById(R.id.tab_host);
        tabHost.setup(this, getSupportFragmentManager(), R.id.real_content);
setupメソッドでどのレイアウトにタブを表示するのかを設定します。
また、タブを追加しているのが次のコードです。
        TabSpec tab1Spec = tabHost.newTabSpec("TAB1");
        Button tab1Button = new Button(this);
        tab1Button.setText("Tab1");
        tab1Spec.setIndicator(tab1Button);
        tabHost.addTab(tab1Spec, Tab1Fragment.class, null);
TabSpecクラスでタブに固有のタグ(例えば"TAB1"など)を割り振り、addTabでタブホストにそのタブを追加します。
必要なタブの数だけこの処理を繰り返します。
この例で作ったアクティビティは次のように2つのタブを持ちます。
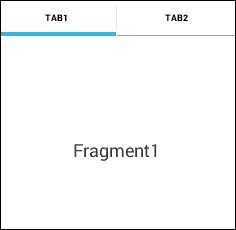
それぞれのタブをクリックすることでタブに関連付けたフラグメントに画面が切り替わります。
© Kaz